Frequently Asked Questions
Q. "Our toilet is a San Raphael #K-3394 but I don't see any parts diagragm for it. Are you able to provide parts for this model?"
A. The San Raphael models K-3394 and K-3094 are pressure assist toilets. Pressure assist toilets have a separate pressure (inner) tank within the cosmetic outer porcelain tank. The pressure assist inner tanks are completely sealed. When the inner pressure tank begins to fill with water, the trapped air inside the pressure tank gets compressed. So, when activated, the pressure-assist action pushes the water out of the tank forcefully into the bowl, effectively pushing the contents of the bowl out through the S-shaped trap. However, any tank involving pressure can fail and due to safety concerns with pressure assist toilets, we choose not to offer these types of toilets nor do we offer parts for these models. There are many toilet models that were offered as both "pressure assist" and "non-pressure assist" and we offer parts for the "non-pressure assist" models.
Q. "Why do the 84503 and 84499 come with two flush valve gaskets? Don't you only need one gasket for installation?"
A. These repair kits include two slightly different flush valve gaskets so they can be used to repair a variety of toilet models. In the case of the San Raphael, the larger gasket is used when replacing the flush valve for the 3397, while the smaller gasket works perfectly for the 3395.
Q. "How do I adjust the water level for the 84499 conversion kit?"
A. As with any conversion or "will fit" replacement kit, you might need to make slight adjustments for the unit to function exactly like your original valve did. For the 84499 fill valve, you simply turn the adjustment screw counterclockwise to raise the water lever or clockwise to lower the water level. You may need to flush the toilet and keep turning either way until the water level in the tank matches the line on the flush valve overflow tube. If you're not sure where to find the adjustment screw or water level, view our handy parts diagram.
Q. "How do I install the Fluidmaster 747 Fill Valve Service Kit?"
A. To install the Fluidmaster 747 Fill Valve Service Kit, you need to first turn the water supply to the toilet off. Using your fingers, turn the cap (usually blue but not always) connected to the copper riser tube a quarter of a turn counterclockwise to release the cap from the float assembly. A wrench should not be required. Once the cap is disconnected from the tabs keeping it in place, pull the float assembly straight off. Align the replacement Fluidmaster 747 fill valve service kit (float assembly) up and push it back into the cap and turn the cap clockwise a quarter of a turn until it tightens onto the tabs on the float assembly (fill valve service kit). Turn your water back on and check for leaks.
Q. "The 84499 1B1X conversion kit includes a diverter assembly on the fill valve but you also offer other 1B1X fill valves without a diverter assembly. If I purchase a 1B1X fill valve separately should I order the one with a diverter or without a diverter?"
A. If your toilet fill valve currently has a diverter, we believe you should purchase a 1B1X with a diverter. Older toilets came with 1B1X fill valves without a diverter. The diverter assembly was invented as a water saving device for the 1B1X fill valve and was added in later years after stricter laws regarding water saving toilets came into effect. When properly installed, the diverter assembly allows water to flow into the bowl and the tank at the same time. As the water in the tank reaches a certain level, the float on the diverter assembly closes off the water flowing into the bowl and diverts that water so it flows into the tank instead. The extra flow of water into the tank then helps fill the tank quicker causing the float ball to rise and turn off the fill valve completely. Without a diverter, the 1B1X fill valve will continue to flow water to the bowl the entire time the tank is filling up. The #84499 1B1X conversion kit was designed by Kohler to upgrade their older toilets to be more water saving. If you do choose to install the 1B1X-WF fill valve you will just put the tube into the hole for the bowl flush, and water will flow until the tank fills up through the tank tube.
Q. "How do I find my Kohler model number?"
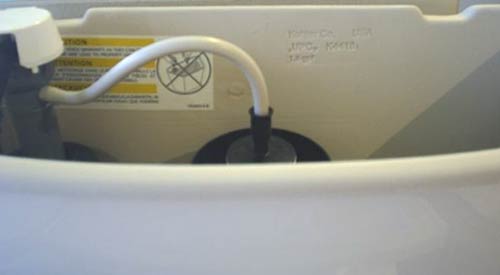
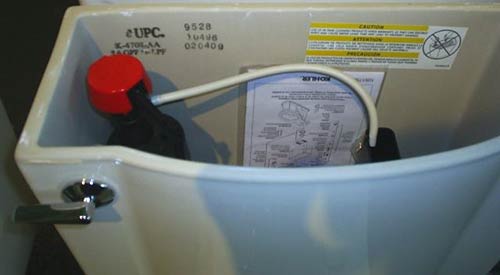
A. For our customers' convenience, we often list both the model number and the tank number of the Kohler toilets we offer parts for. If you already know your model number, that's great - but oftentimes this information won't be available to you. What you'll need to do then is look for the TANK number, which is right where you'd expect it to be on the inside of your toilet tank. Grab a flashlight, carefully remove your tank lid, place your lid somewhere safe, and look around inside your toilet tank for a 4-digit number beginning with either a 3 or a 4. Certain specialty toilets may have a 5-digit number starting with a 1. The number will be either molded into the porcelain or stamped on in blue or black ink. This is your tank number and you can use it to find the parts you need to fix your toilet.


Q. "There are letters and/or numbers after the model number inside my Kohler toilet tank - what do those mean?"
A. Kohler offers many variations of almost all their toilet models, and has experimented in the past with many different features. Typically, numbers (or a single letter/number combination like K4 or Y2) after the 4- or 5-digit model number indicate the color code for your toilet. If your model number is followed by letters, those usually have different meanings to indicate the features of your toilet or will indicate that you have a specialty Artist Edition toilet.
| Code |
Meaning |
| AA |
Water-Guard toilet flushing system - Old flush system that has long been discontinued |
| EL |
Toilet with Elongated Bowl |
| K |
Eco Lite tank |
| L |
Bedpan lugs or a Pressure Lite flush system - Both older features that have been discontinued |
| RA |
Tank with RIGHT side trip lever |
| T |
Tank locking system (vandal-resistant feature usually on commercial toilets) |
| U |
Insuliner® lined toilet tank |
| UR |
Insuliner® lined toilet tank with RIGHT side trip lever |
| X |
Peacekeeper® seat actuated flushing system - Discontinued |
| Code |
Color Name |
Code |
Color Name |
Code |
Color Name |
| 0 |
White |
02 |
Spruce Green |
03 |
Lavender |
| 04 |
Suez Tan |
06 |
Skylight |
07 |
Black |
| 08 |
Cerulean Blue |
10 |
Peachblow |
12 |
Jersey Cream |
| 17 |
Teal |
18 |
Sunrise |
21 |
Avocado |
| 24 |
Expresso |
31 |
Harvest Gold |
32 |
New Orleans Blue |
| 33 |
Mexican Sand |
34 |
Fresh Green |
35 |
Pink Champagne |
| 40 |
Parchment |
41 |
Country Grey |
42 |
Aspen Green |
| 44 |
Swiss Chocolate |
45 |
Wild Rose |
47 |
Almond |
| 49 |
French Vanilla |
52 |
Navy |
53 |
Raspberry Puree |
| 55 |
Innocent Blush |
56 |
Tender Grey |
58 |
Thunder Grey |
| 68 |
Heron Blue |
71 |
Seafoam Green |
85 |
Merlot |
| 89 |
Desert Bloom |
95 |
Ice Grey |
96 |
Biscuit |
| 97 |
Timberline |
98 |
Chamois |
G9 |
Sandbar |
| K4 |
Cashmere |
NG |
Tea Green |
S1 |
Biscuit Satin |
| S2 |
White Satin |
W2 |
Earthen White |
Y2 |
Sunlight |
